

Set up your classes
Before labeling, define the classes your project detects:- In your project, open Classes & Tags.
- Add a class for each thing you want to detect (for example,
passandfail), each with its own color.
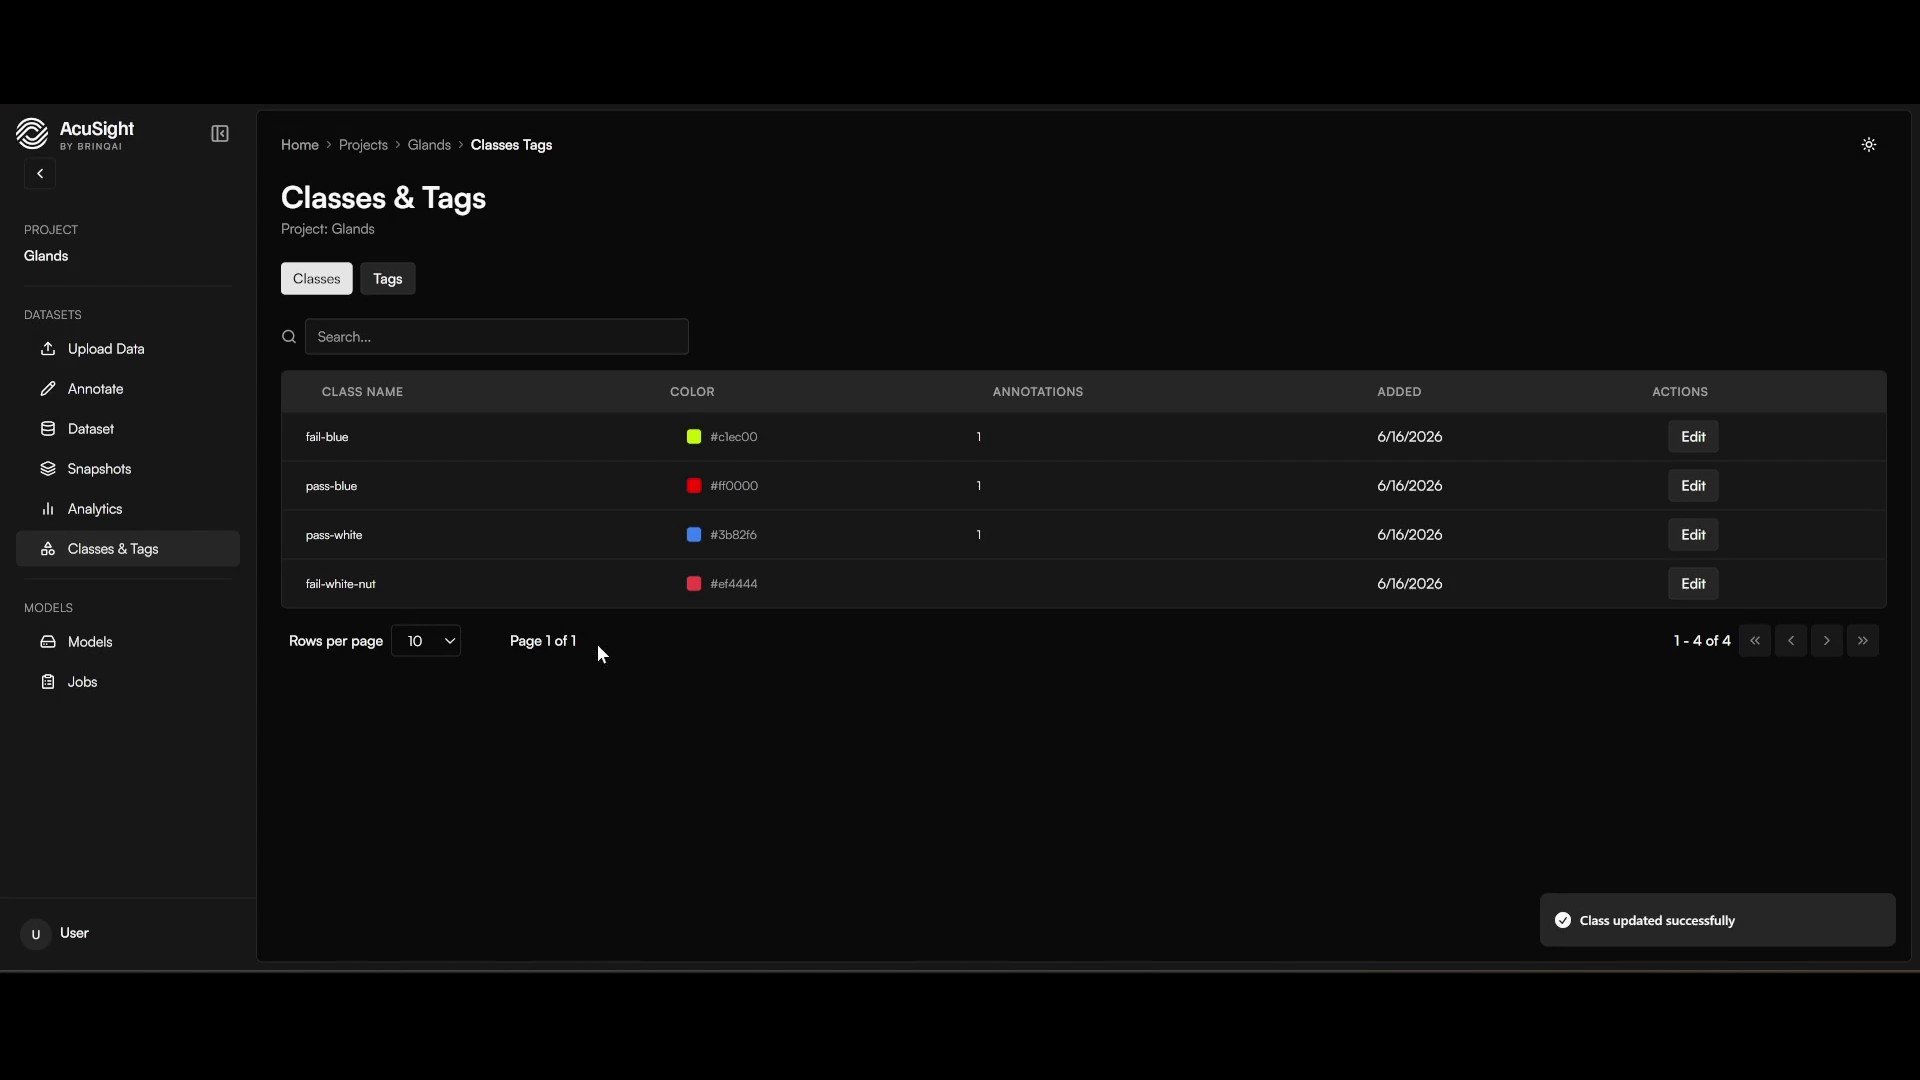
Each class gets a name and a color; you can also add free-form tags.
Label a batch
- Open Annotate and select a batch from the Unassigned column.
- For each image, draw a box around every object and pick its class.
- Use the arrows to move through the batch — your progress is tracked as you go.
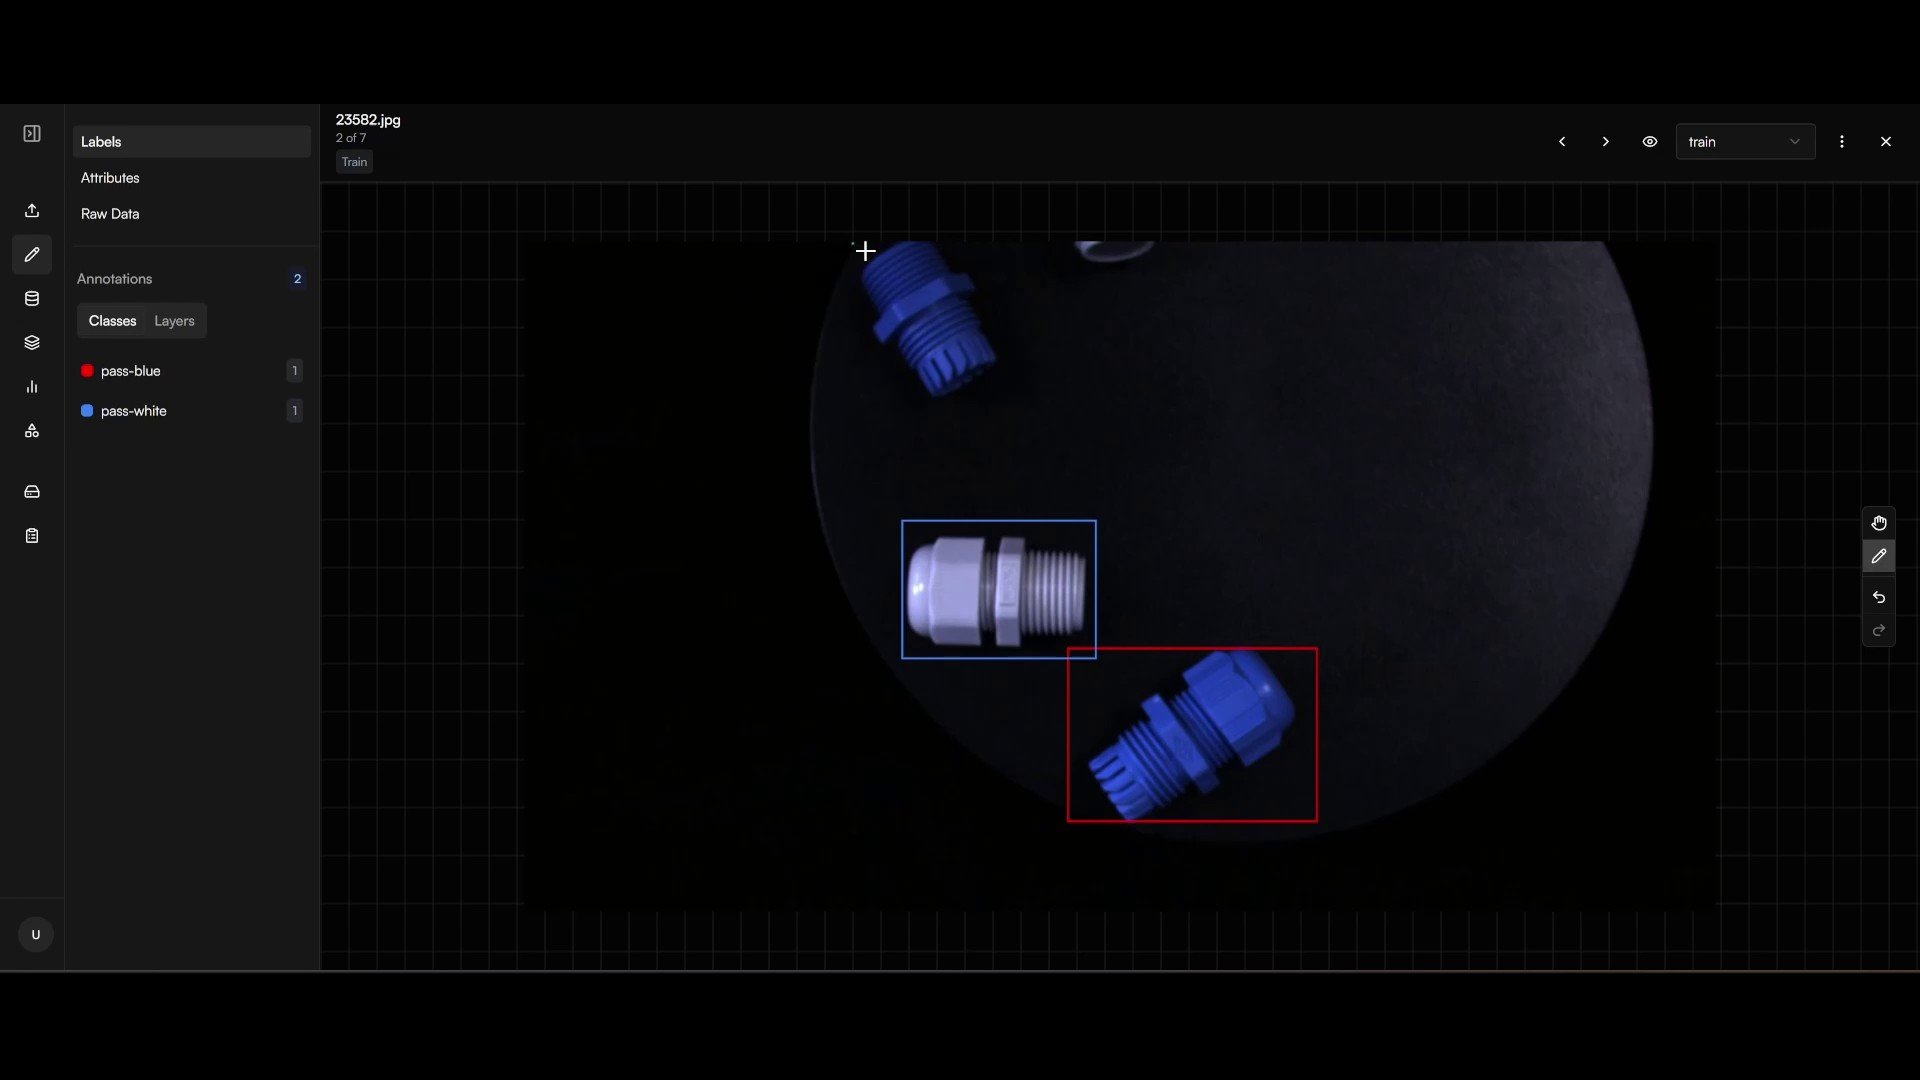
Draw a box around each object and assign it a class.
Review and add to the dataset
As you finish images, mark them reviewed. Filter by Reviewed / Not reviewed or Has annotations / No annotations to check your work. When a batch is ready, choose Mark all reviewed & add to dataset and assign a train/validation/test split. The batch moves into the Dataset column, ready to snapshot.Next steps
Create a dataset version
Freeze your labeled images into a reproducible snapshot.
Projects & batches
How batches move from collection through annotation to dataset.